Twing! Twing!
It was a nice evening today and I was busy enjoying my few cups of Stanley when suddenly my brain was filled with lots of ideas about lighting equipments. Previously I had ideas of making some softboxes, but the idea didn't materialize as I have not figured out how to make it solid but light enough for the flash head to support it. As the ideas came rushing in, I came across something called a beauty dish.
What's a beauty dish? I'll show you in a moment. It produces a nice mixture of soft and harsh light if done rightly. It has the shape of a dish plate, but I'm not sure how 'beauty' can be associated with it as mine isn't nice to look at. Maybe the output of the lighting from it can make someone more beautiful? Let us try it then!
What do you need to make your own beauty dish?
1. Some hard paper. I used 130gm paper.
2. Aluminium foil.
3. PVA glue(the white glue).
4. Paper tape.
5. Scissors, knife etc.
6. Drinks. It can be tiring and will take some time to finish.
Procedures :

Fold the paper into half. For this dish I used two sheets to make the dish bigger.

I used a plastic lid to make a semi circle on the paper.

Here's how it looked after I cut it by following the red marker.

From the middle, cut out a piece of semi circle as if you're cutting a cake.

Lay out the semi circle to reveal an incomplete 'moon'.

Pull the two sharp edges together and secure it using paper tape. You should produces a cone-like shape like the one above.

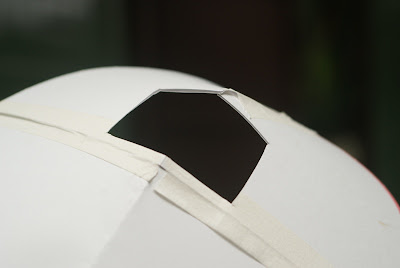
Cut a rectangular hole to fit you flash head at the tip of the cone.

Wrap the same paper around the flash head. Secure it using the paper tape and slid the open end of it into the hole.

Cut the edges of the paper and secure it onto the inner part of the cone.

Spread the PVA glue evenly onto the inner part of the cone, and stick the aluminium foil on it.

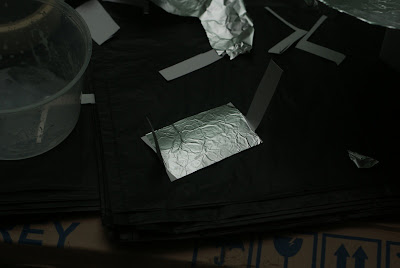
Cut a small piece of paper like the one above, and stick the rectangular part with aluminium foil. This will act as a reflector.

Stick the two small parts into the hole, and adjust the distance of the reflector from the hole.
After it dried up, time for some potrait testing. Took some of my housemate's photos for refference.
Flash was put on 1/4 power, approximately 40cm from their faces.


Wohhoo! Finally I can see some balance in the lighting. All I need to do now is to DIY a better one. Thanks Stanley for the tip. What will you inspire me for tomorrow ya?


mcm satelite.
ReplyDeletestyle eh DIY ko bro..remind me of mcm satelite dish zaman 80-an dulu... ;)
ReplyDeleteheheh. makaseh. satelit jak cun shape. sik pat polah kuih donat.
ReplyDeleteI like the photo of the spoon and the drip caught in motion. How did you do that? I am an amature so please fill me in.
ReplyDeletehie geri. thanks for the visit. I used a high shutter speed(1/6400), aperture of F10-13 with a Tamron sp90 macro lens set to manual. An external flash was put at the left side Just as the water drop landed on the spoon, took a shot and adjust the settings of the camera and flash accordingly. Practice makes perfect however.
ReplyDelete